There are generally two ways to grow weed. The first is from seeds and the second from clones. If you’ve found the perfect cannabis plant and believe that it’s time to clone it, we’re going to teach you how. With this how-to, you’ll have successful clones within ten days.
If you have been trying your green thumb at cannabis breeding, the next logical step might be to start cloning. Most breeders won’t start a cloning process until they’ve arrived at one or some of their best performing plants. This is because the cloning technique of reproducing cannabis creates exact replicas of the plants that they came from.
Producing plants from a cannabis seed necessarily means that there will be some variation in the final crop. But a garden created from clones will produce almost identical plants. As you can imagine, cloning is only something valuable if you’ve stumbled across a treasure.
If you consider yourself lucky enough to have found that golden nugget, then this article is for you. We are going to teach you successful methods of cloning so that you can continue to produce the plant of your dreams.
Reasons to clone a cannabis plant

So, what makes a particular plant a good candidate for cloning?
When you’ve just started breeding plants, you will observe a huge variety of phenotypes in your garden. Some plants will grow bigger, some will be weak, some will be potent and so on.
More often than not, breeders are looking for plants that are strong, have a great cannabinoid potency, are pungent and that yield good amounts. Sometimes you will not necessarily get all of these in a single plant, and that’s why many generations of breeding might take place until you arrive at the one.
Other factors become important to certain growers, too – such as the growing time and the size. Essentially, you need to choose which characteristics you wish to see most of in your garden, and then you need to clone those plants.
Cloning is also a good way to avoid having to purchase seeds if you have a favourite strain and don’t want to buy the same product over and over again. Having said that, there are plenty of growers who appreciate a variety in their garden.
Once you’ve carefully selected which plants you want to perpetuate, it’s time to get underway with the cloning process. It’s much faster than growing from germination, and it’s surprisingly easy.
Getting the right equipment
Although cloning is relatively easy, it does require collecting some neat little gadgets that you might not already have. These tools are essential to the cloning technique and they will give you a better chance of success.
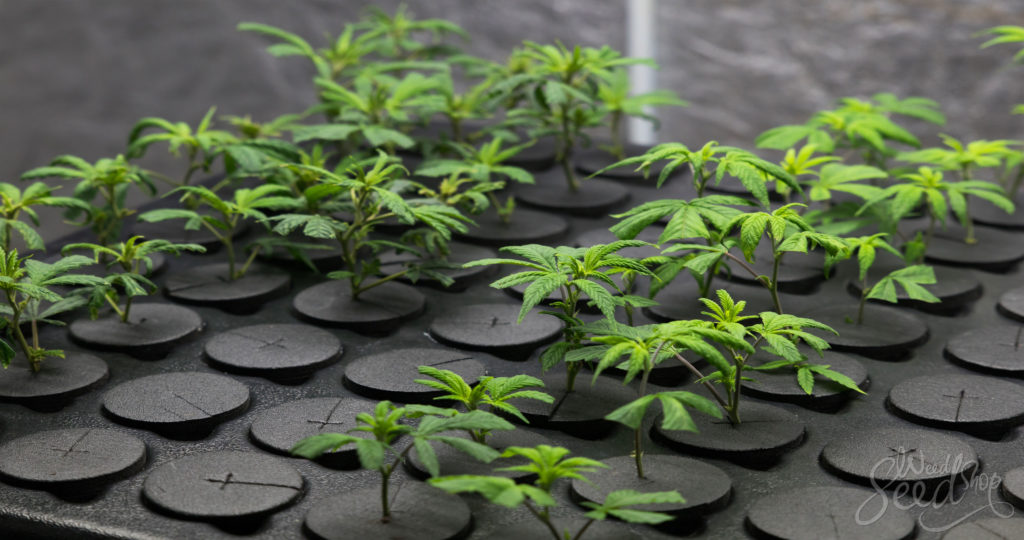
- A cloning tray: It is not imperative to have a cloning tray. But it’s definitely going to make things much less complicated. A cloning tray helps to maintain the correct humidity for your clones to start growing roots.
- A rooting medium: The best cloning medium is also up for debate. You can use rockwool or compressed peat pallets, which are the most highly recommended and the most consistent. The alternative is to root the plants in water, which doesn’t require the use of a rooting hormone.
- A rooting hormone: There are a variety of rooting hormones you can use for this. Any brand will do, really. But be aware that some plants will respond better to a gel form and others will respond better to a powdered form of rooting hormone. To mitigate this problem (since you won’t know until you do it), you can just use both. It doesn’t hurt, and it ensures that the plant will respond.
- A razor blade: You’ll need this for taking cuttings off your mother plant

- A large mixing bowl with water in it: To protect your cuttings after you remove them from the mother
- A spray bottle with water in it: For maintaining moisture during the rooting process.
- A good quality grow light: Because clones need some light, too.
How to prepare the cuttings
For correct and successful rooting of your clones, you will need to prepare your cuttings the right way. Firstly, abstain from giving the mother plant any fertilizer in the days leading up to cloning. If there’s too much nitrogen in the leaves and stems of your cutting, it will continue to vegetate rather than to grow roots.
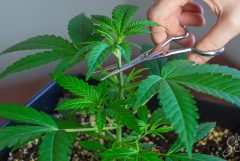
Secondly, you should cut as close to the main stem as possible on a 45-degree angle. It’s best if you pick branches that are lower in the plant. They tend to be stealthier. It’s also best to cut the blades of the leaves to make them shorter.
As soon as you have made the cuttings, put them directly in a tray or bowl that has water in it. It will make sure that your stems don’t start to dry up and form air bubbles inside.
How to start rooting
Now that you’ve got you cuttings ready, it’s time to prepare the rooting medium and get your cuttings inside! This is the most important part of the entire process.
- Begin by soaking the peat pallets in warm water. If you are using rockwool, you can skip this step. Soaking the pallets will make them expand in size.
- Make rows of peat pallets or rockwool in your cloning tray.
- Now it’s time for the rooting hormone. You can take your cuttings and dip the bottom (the end that will form roots) into the rooting gel. Then dip them into the rooting powder. There will be two layers of rooting hormone on each clone.
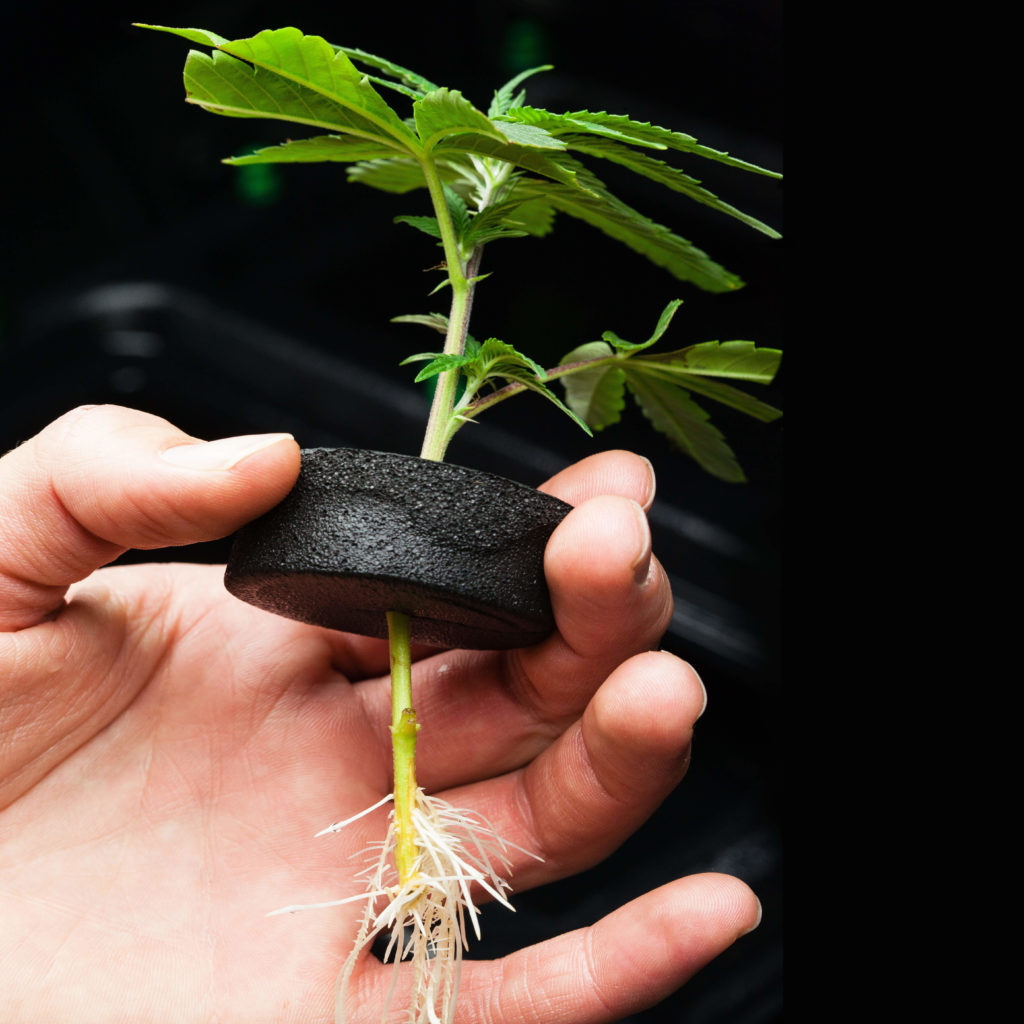
- Carefully insert each of your clones into the peat pallets. Press the stem into the pallet at the base so that it fits snugly inside. If the cutting falls out of the pallet, you won’t get roots. If you are using rockwool, there is a hole at the top. Make sure the stem fits well inside this space.
- Now all of your clones are in pallets or rockwool. Add a teaspoon of water to the base of each stem. It will activate all of the rooting hormones and prepare you for putting the clones under light.
- Spray your clones with a little bit of water, and do the same with the roof of your cloning tray. Humidity is imperative to getting roots out of your clones.
- Now you can put the roof on the cloning tray and put it under lights. The strength of your lights will depend on how many clones you have. In general, fluorescent lights should be about 2.5-5cm above the tray. If you are using metal halide lights, they need to be much further away at about 60cm above the tray.
- The more light they get, the better. Leave the light on for 18 hours a day.
- The roof or lid of a cloning tray almost always comes with vents. Leave the vents closed for the first two days. This will encourage moisture to stay inside.
Now your cloning tray is ready and full of clones. The hardest part is done. Maintaining the tray for the next week or so is all that needs to happen for your plants to have created roots.
Maintaining the cloning tray:
- Keep the room at about 20° Every day, you should open the cloning tray and spray the plants as well as the roof of the tray with water.
- On day 3 open the vents on the roof of the cloning tray. It means your peat pallets will start to dry out, and your cuttings will have to go searching for moisture by sending out roots. Continue to spray with water twice a day even when the vents are open.
- Around day 5, it’s time to check if your pallets or rockwool are dry to touch. If the answer is yes, add half a litre of water to the cloning tray. Make sure to add it to the tray itself rather than to the top of the pallets or rockwool. You’re trying to tell your clones to search for water at the bottom. If you add it to the top of the pallets, they won’t make very long roots.
- The next day, close the vents of the cloning tray and continue to spray them with water twice a day for the next two days. By this time most of your clones should be showing roots.
- For day 8 and 9, almost all your clones should have roots. So, it’s time to give them some very light So, add half a litre of water to the cloning tray with a very light concentration of nutrients. Keep the vents closed. It will keep the nutrients cycling.
- By day 10, it’s time to take the roof off the cloning tray. Let your plants adjust to regular humidity.
A note on transplanting
Now that your clones have roots, they are ready for some soil! But be careful when it comes time to transplant them into pots. They are still very fragile beings. If you aren’t gentle when it comes to transplanting, then you might undo all of the hard work you did during cloning.
Once they are in the growing medium, you can treat them as though they are regular plants. Now you’ve created cannabis plants by cloning! Congratulations!


