There is more than one way that a cannabis plant can develop problems during its growth cycle, and these problems can be catalysed by a number of problems. Cannabis plants can fall victim to nutrient problems, environmental problems, pest and insect problems, as well as diseases that take over the cannabis plant. The objective today will be to give you noticeable ways to identify that your cannabis plant is having a problem, and to figure out exactly what kind of problem it is.
For most seasoned growers, identifying a problem with a cannabis plant is easy. It is a matter of fixing the problem that is the headache. However, for those that are new to growing weed, just identifying that there is a problem at all before it becomes severe can be an enormous problem. The key to handling a problem with a growing cannabis plant is early detection, so that the problem can be treated before it kills the plant. The objective today will be to give you noticeable ways to identify that your weed plant is having a problem, and to figure out exactly what kind of problem it is.
Nutrient problems
Nutrient deficiency or nutrient burn are some of the most popular problems that are experienced by growers. It is common for weed to experience a nutrient deficiency because it is a very fast-growing plant species which consumes a lot of nutrients in its growth process. If the soil is not maintained with the correct nutrients, then the plant will suffer as a result and potentially die. It is also common for plants to experience nutrient burn, which is when the grower uses too many nutrients, and the plant cannot process them. This results in too many nutrients, and again is a problem for the plant.
If your plant is experiencing nutrient burn, the most identifiable way will be through the leaves. You may see brown spots appear on your leaves, and they may begin to burn, turning a brown colour and curling under. The new growths will appear stunted and the overall growth of the plant will be slowed. In this situation, what is the most important is that some of the nutrients in the soil find their way out. The best way to do this is with water, or a process otherwise known as flushing. This means watering your plants with pure water, therefore diluting the amount of nutrients present.
Nitrogen Deficiency
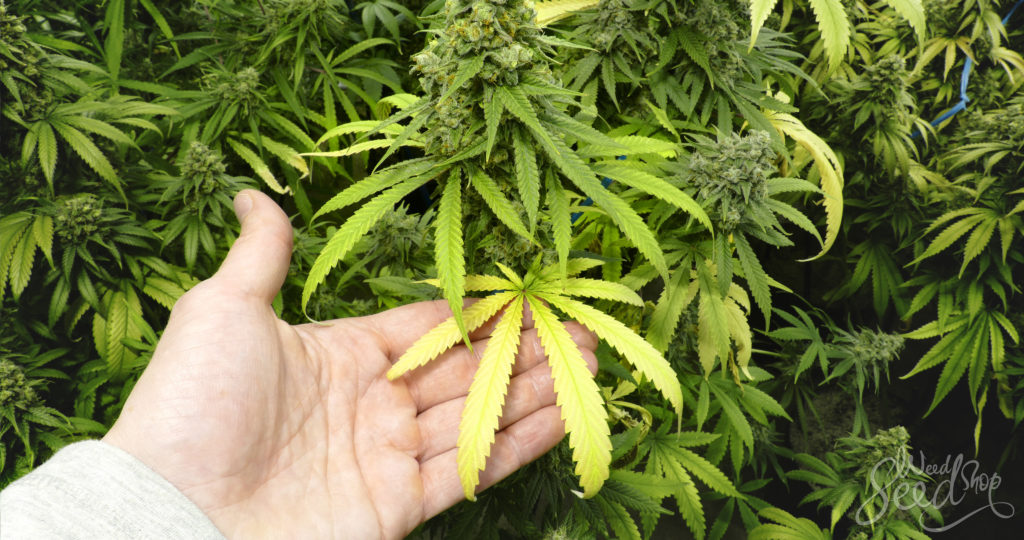
Nitrogen deficiency is one of the more likely nutrient deficiencies to occur in a weed growing operation. The deficiency begins in the lower leaves of the plant, and they will begin to turn a pale green colour. As the deficiency spreads, the leaves will turn yellow and begin to fall off. The nitrogen left in the plant will travel upwards to the new growth, and as a result the yellowed part of the plant will continue to move up from the bottom. It is normal for the leaves to start turning yellow and begin to fall off during the flowering stage of your cannabis plant, but if you notice this is happening during the vegetation stage, your plant needs more nitrogen.
Any plant food will do the trick of providing your plant with more nitrogen. It is important to choose a plant food that is high in nitrogen, as this is what is lacking from the plant. Nitrogen levels will naturally drop during the flowering and harvesting stages (and it is in fact healthy for your plant to lower its nitrogen levels). However, it is important to maintain high nitrogen levels during the vegetation phase, as nitrogen assists during the photosynthesis process and with the growth of good buds.
Phosphorous deficiency
Phosphorous is another main nutrient that is required for the healthy growth of cannabis. It is an important nutrient for the plant during its entire growth phase, and so it will therefore be noticeable if at any point your plant begins suffering from a phosphorous deficiency. You should avoid adding any extra phosphorous unless you have identified that the plant is deficient and requires more.
Usually, when weed is experiencing a phosphorous deficiency, the plant will significantly slow down its rate of growth, and the new leaves will grow very small. The older leaves, however, will be the first ones to show the signs of phosphorous deficiency, and they will show this through turning dark green before developing purple and blue spots. The plant’s stems may begin to turn purple and red if there is a phosphorous deficiency. It is even more likely that there is a phosphorous deficiency if you notice these irregularities on parts of the plant that are directly receiving sunlight.
If your plant is experiencing a phosphorous deficiency, there are many plant mixes you can buy that contain a lot of phosphorous. Basically any plant food that is made for budding or flowering plants contains a lot of phosphorous, because flowering plants can’t get enough of it! Otherwise, things that are high in phosphorous include bone or blood meal, worm tea, soft rock phosphate, fish meal, and crab shell. Any of these can be added to the soil to promote phosphorous production.
Potassium deficiency
Potassium is the nutrient required in your plant to assist with transporting water, which is required in every part of the plant. It is therefore important that the potassium levels of your cannabis plant stay healthy. It is extremely important for the health and wellbeing of your plant that the potassium levels stay high during the entire life cycle of the plant.
It is extremely unlikely (or impossible) that a potassium deficiency will occur in a hydroponic system, and it almost always occurs in outdoor operations occurring in soil. The most likely cause for a potassium deficiency in a cannabis plant is incorrect fertilization. Usually, a plant without enough potassium could grow taller than other plants in your garden, causing the stem to weaken and potentially break. You will also begin to identify some leaf death. If you do not treat it at this point, the leaves can begin to develop red and yellow patches. When the deficiency becomes more serious, your plant’s growth will begin to slow down and new leaves will grow much smaller.
To fix a potassium deficiency, one way is to use a fertilizer that contains high amounts of potassium. Another extremely rich source of potassium for plants is wood ash, and this can be poured on the soil to encourage potassium production.
Manesium deficiency
The fourth most likely nutrient deficiency to occur with your cannabis plant is a magnesium deficiency. It rarely occurs for an outdoor plant to experience a magnesium deficiency, and is more often than not experienced by those growing weed in a hydroponic system. If it is not handled quickly, a magnesium deficiency can quickly ruin your plant. Again, magnesium moves from the lower end of the plant to the higher, meaning that the symptoms of a magnesium deficient plant will be identified in the lower half.
The leaves will begin to turn yellow, curl in, and then begin to die if the cannabis plant is experiencing a magnesium deficiency. Growing shoots will turn from pale green to white, and petioles and stems will turn purple in colour. To rectify the problem of a magnesium deficiency, growers can apply magnesium sulfate, garden lime, Epsom salts, or worm castings. These will quickly solve the problem of a magnesium deficiency. Epsom salts are the best solution, as they are easily soluble in water and can be used as a solution for both outdoor and hydroponic systems.
pH levels
One of the main reasons for nutrient deficiency is an imbalance in the pH levels required to grow weed. pH is the measure of how acidic or alkaline a solution is, and it is important that the pH levels of the system in which cannabis is being grown is properly maintained. Most cannabis plants enjoy an environment that is slightly acidic, flourishing in a pH environment around 6.
Ensuring that the pH levels are properly maintained when you are watering your plant helps you to ensure that you are providing the correct environment for weed. This will also help ensure that you do not experience things like magnesium deficiencies in your plant.
Diseases
Aside from nutrient problems, cannabis plants are also susceptible to diseases. Sometimes, these are occurring in parts of the plant that you cannot actually see, which makes it a little tricky to identify the problem before it’s too late. Diseases usually occur as a result of the environment in which the plants are growing and, in most cases, diseases can be prevented. In the case they arise, they can be treated.
White, powdery mildew
White, powdery mildew on cannabis leaves is one of the most common diseases for growers to have to deal with when it comes to growing cannabis. It is the result of a lot of different fungi that remain dormant on the leaves until the environment is perfect, at which point they begin exhibiting a white, powdery substance on your cannabis leaves. The spores that end up growing these little fungi on your leaves are transported to your plant through the wind, insects, animals, and even you. It is most likely to occur in areas where humidity exceeds 55% and there is not much ventilation happening where you are growing. Allowing too much white, powdery mildew to occur on your plant will affect photosynthesis, and therefore will affect your harvest, so it is important to handle this issue quickly.
Where possible, it is better to avoid white, powdery mildew than to treat it when it comes up. One way to avoid this disease is to mist spray your plants with a mixture that is made up of 2 tablespoons of apple cider vinegar and one quart of water. You can use this mixture to prevent, as well as to use on mildew that has already appeared. It will kill the spores and prevent new ones from coming up. You can also spray neem oil, sesame oil, and fish oil to kill mildew.
Bud rot
Any grower who has had experience with bud rot knows that it is probably the most devastating thing that can happen to your cannabis plant. The problem with bud rot is that the rot that takes over your buds begins from the inside out, and literally eats away at your buds from the inside. This disease is so cruel, it can kill your entire cannabis plantation very quickly. It even can affect seeds, so anything that is in your garden can be severely affected by bud rot.
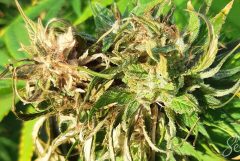
Bud rot is otherwise known as grey mould, and the spores for grey mould can be transported through wind. It usually begins in the youngest stems right where the soil begins, and it turns the stems brown and rotten. It is important to identify bud rot at this point, because after this the rot will begin to spread to the buds of your cannabis plant and could ruin your entire harvest. The inside of the buds will begin dying even though the rest of your plant could look extremely healthy from the outside.
The best way to treat bud rot is to make sure it doesn’t happen in the first place. This means choosing a strain that is suitable for the climate you are growing it in, and keeping humidity levels low in indoor systems. Keep the ventilation good and strong to encourage air flow between the leaves of your plant. Keeping leaf density down is also a good way to prevent bud rot. You can use copper spray or copper soap to treat your plants if the bud rot has already occurred.
As a general rule, if one of your plants becomes infested with grey mould, it is better to remove it from your plantation entirely. Remove it and throw it away. This also goes for any parts of your plant that have bud rot that has not spread so far as you can see. Keeping an infected plant away from the rest of your garden is important, because bud rot will ruin the rest of your garden.
Pests
Pests are the diseases that happen to your cannabis plant in the form of little flying insects. In fact, even cats and dogs can be pests to your cannabis plant but are far less likely to be so than insects. Usually, the best way to handle pests is organically with permaculture techniques. If you let a pest problem get out of hand, your cannabis plant can be compromised as a result.
Crickets and grasshoppers
Crickets and grasshoppers can pose a serious threat to your cannabis plant if there are too many of them around. The danger is that they will feed on your cannabis plant, and just about every part of it. If they are not chewing on the leaves, then it is likely that they are burying holes in and around the soil in which your weed is growing. This breaks up the soil and creates an unhealthy environment for your plant. You can also notice if you have a problem with crickets or grasshoppers if there are brown patches on your leaves.
You can try adding nematodes to your soil. This helps you deal with the problem organically. If you prepare the soil with organic compost before growing, the problem will be prevented.
Aphids
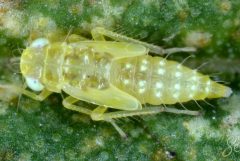
Aphids are probably the most common insect infestation that can occur on a cannabis plant. They can be hard to spot because they hide on the underside of the leaves on your plant. Not only do aphids chew on your plant, but they deposit a sweet substance called honeydew on the leaves. This can cause other insect problems like crickets and grasshoppers, who like to collect sweet things.
You will notice you have an aphid infestation if your leaves are wilted, browning, or turning yellow. There are usually clusters of aphids living on the underside of the leaves. Usually, nature will take care of these problems by sending wasps or ladybugs which will eat the aphids. You can also encourage this process through a method called companion planting, which encourages insects to come along who don’t like the ones that are annoying your plant! Another method is by chopping up tomatoes in water and letting them soak overnight. You can dilute this mixture in a little more water and spray it on your plants.
Spider mites
Spider mites are another common pest for cannabis plants, and these can be a headache to get rid of. Spider mites ruin your plant by going in to consume the chlorophyll, which is a necessary component for the process of photosynthesis. It is hard to notice them straight away because the marks they leave on your plant are extremely tiny. Small spots will appear that are only slightly bigger than the tip of a pencil.
If you conduct leaf inspections often, you can notice them before they become a problem. You might even begin to notice the fine silk on your leaf material. When there becomes too much, your plant begins to look sickly, dirty, and it might even just die. Preventative measures are the best, as always with weed, and using an organic mulch is the best place to begin. This means you’ve probably already added to your soil little bugs that like to deal with the spider mite problem for you.
If you haven’t been able to prevent it, you can use high-pressure water to clean your plants. The high-pressure water will wash off most of the bugs living on the plants. Another option is to use a vacuum cleaner to simply suck off all the bugs and eggs that might be living on your plant. If you put what is left inside the vacuum bag into a plastic bag and into the freezer, the mites will die because they cannot live in cold temperatures.
Environmental stresses
There are other environmental stresses that can cause problems in your cannabis plant, such as too much or too little water, or humidity that is not ideal for weed. Temperature and light also play enormous roles in growing a healthy cannabis plant. Of course, all of these things will vary depending on the strain of cannabis you are growing and the way in which you have decided to grow (indoor or outdoor). However, keeping the environment ideal is one great way to prevent any health problems from occurring to your cannabis plant.
These are some of the most common problems that occur on a growing cannabis plant and some of the ways in which you can identify them. Preventing the problem is always more effective than trying to treat it before it actually becomes one. Remember to inspect your plant regularly for pests and other diseases, and to act quickly if you find that something is astray.





Most of these symtems are from growing out doors ‘ indoor growing problems are from over feeding or under feeding / over watering .