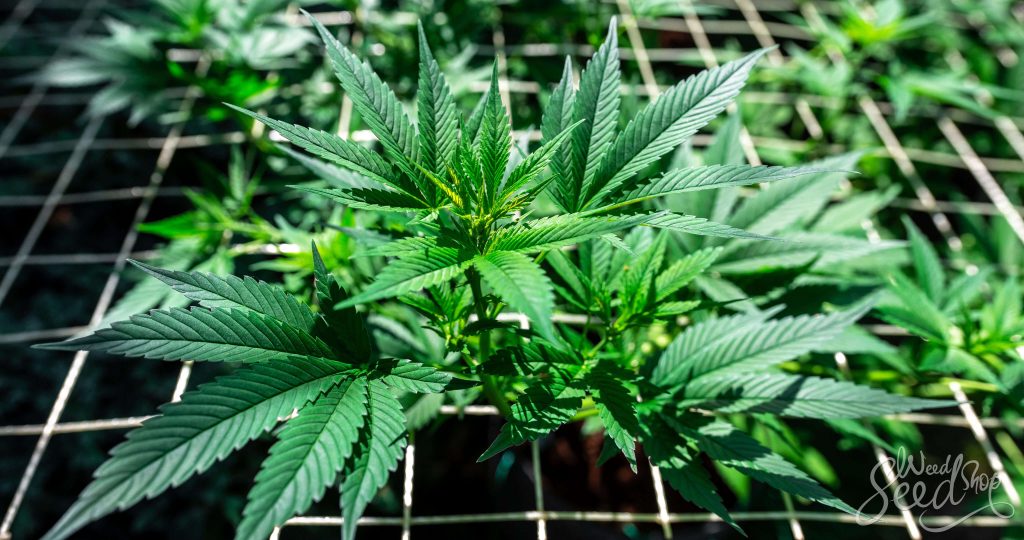
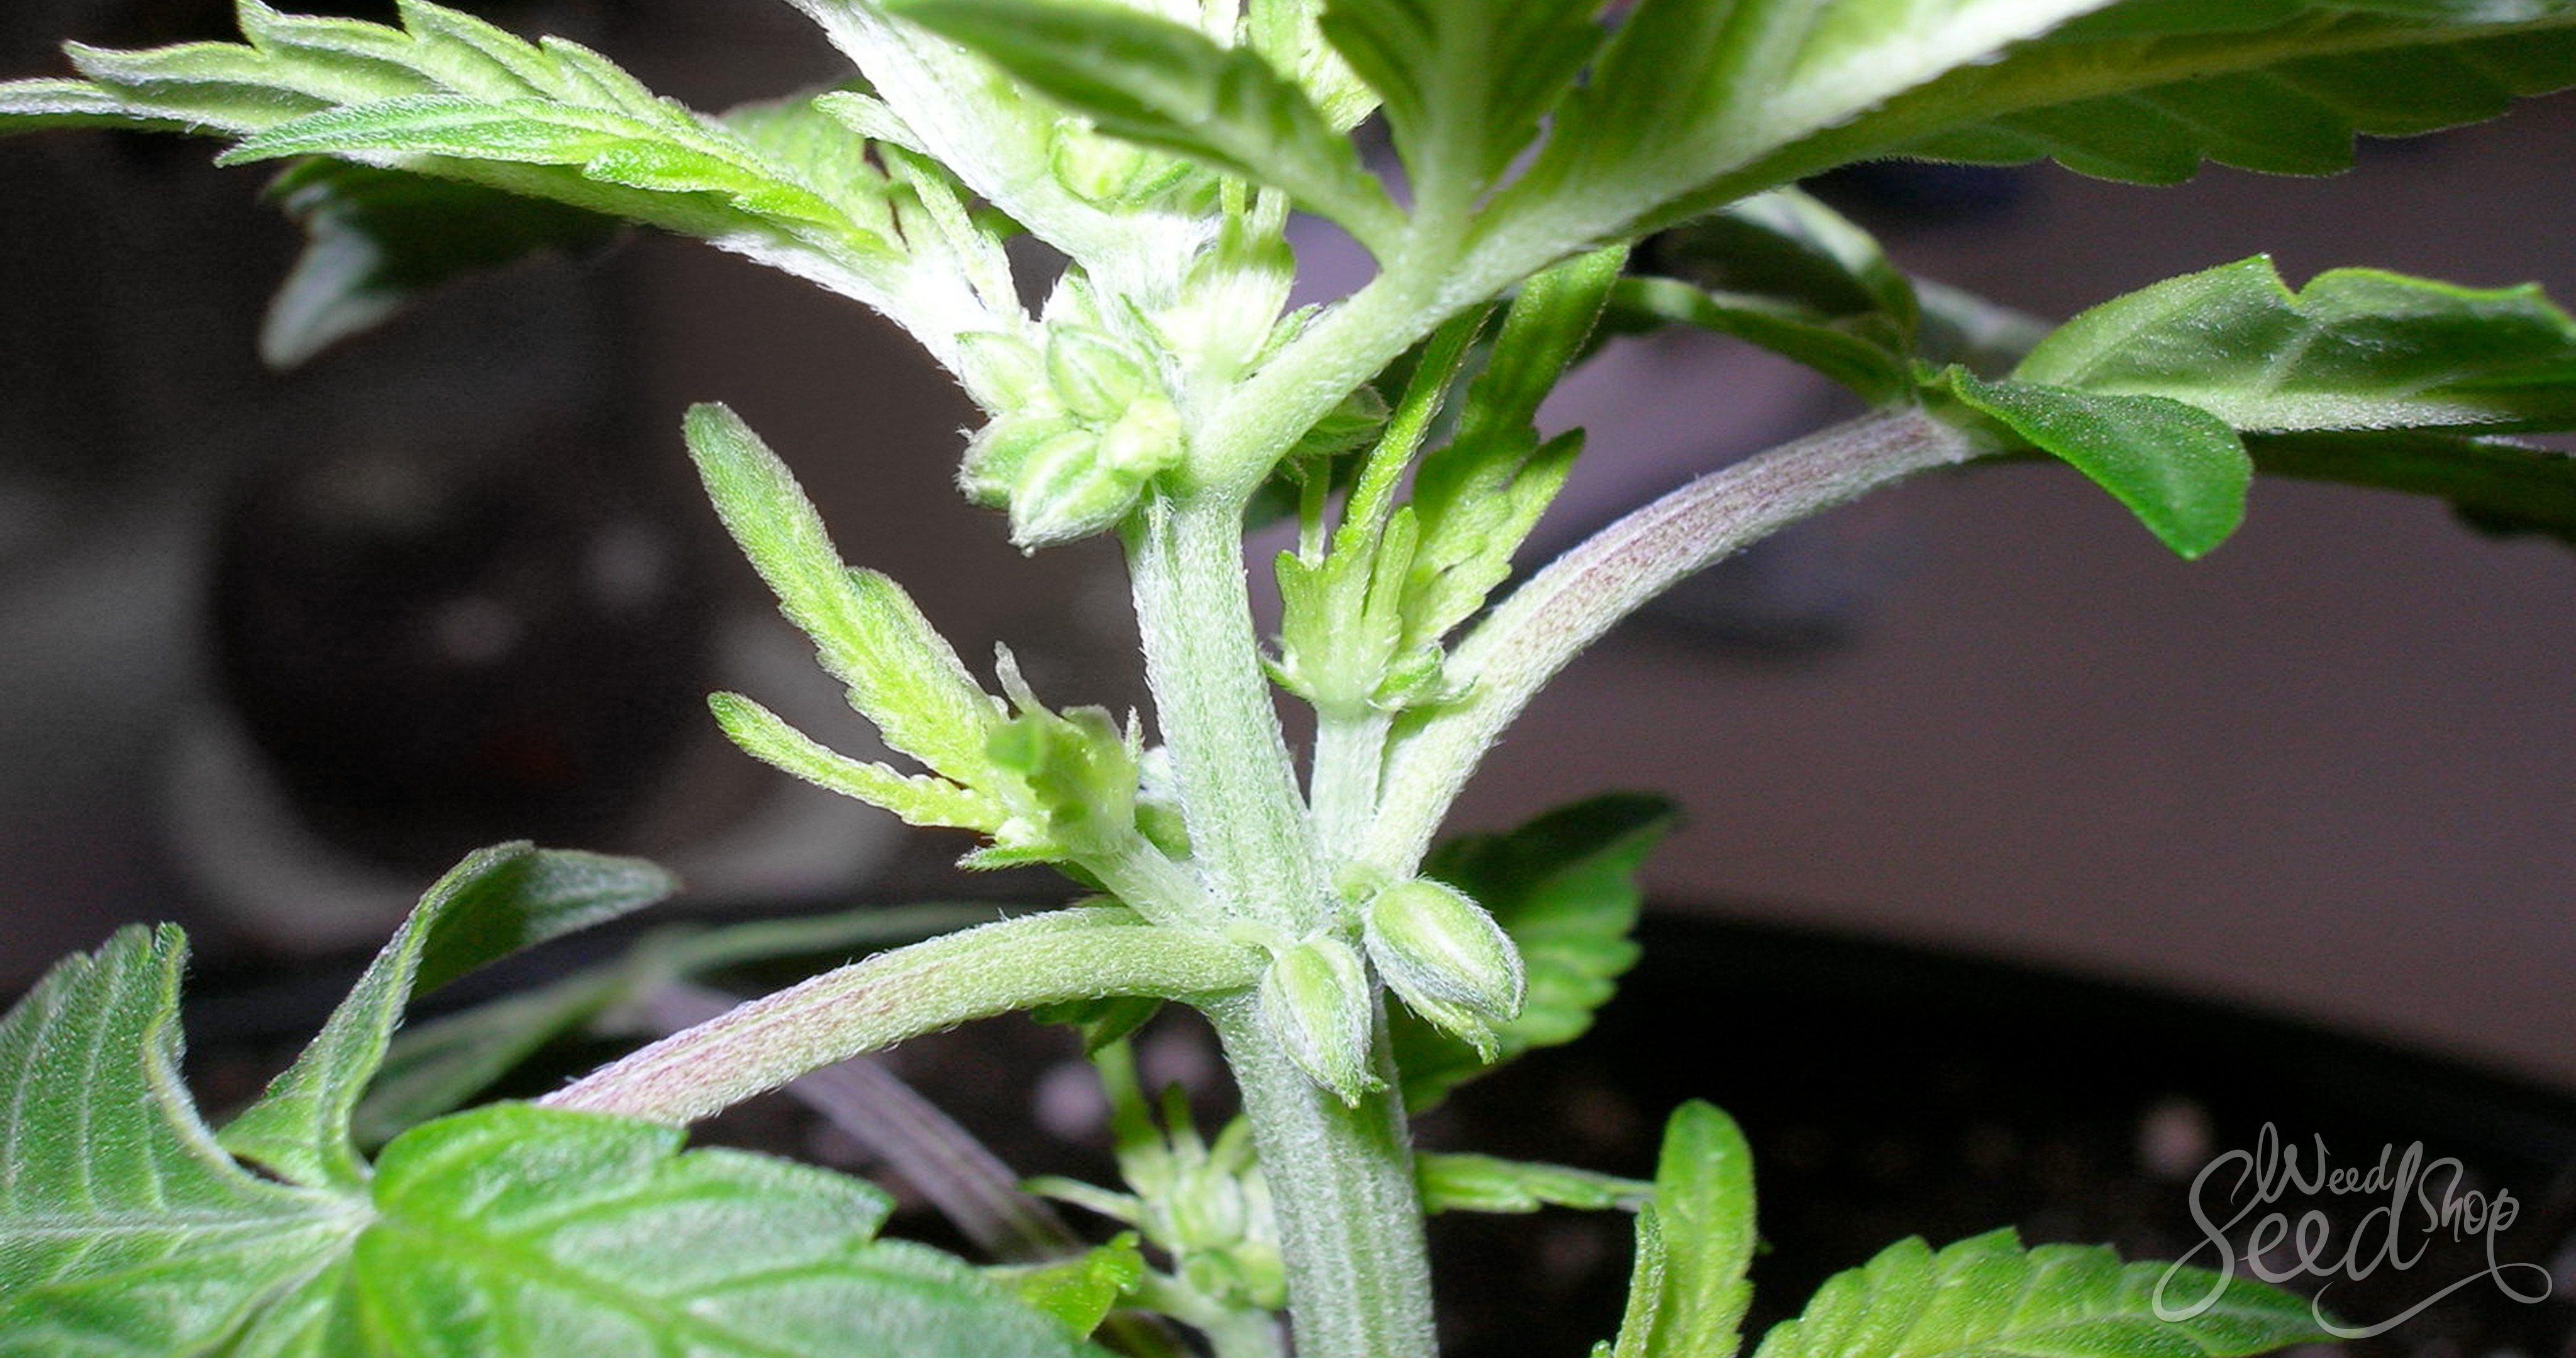
We all want to get the most out of our grow space. However, for one reason or another, you might only be limited to one or two plants. Don’t worry, you can still get heavy harvests with only one plant thanks to SCROG (screen of green) growing. With SCROG, you can maximise your yields without increasing the space or plants required.
- What is SCROG?
- SCROG vs SOG
- Why use SCROG?
- How to set up a SCROG grow
- How much space do I need to SCROG?
- How many plants should I use in SCROG?
- What strains are best for SCROG?
- What size pots should I use for SCROG?
- What are the best lights for SCROG?
- What is a SCROG net?
- When to SCROG
- How to SCROG
- Step 1: Setting up your SCROG
- Step 2: Vegetating plants with SCROG
- Step 3: Weaving your SCROG
- Step 4: Flowering your SCROG
- Best SCROG growing techniques
What is SCROG?
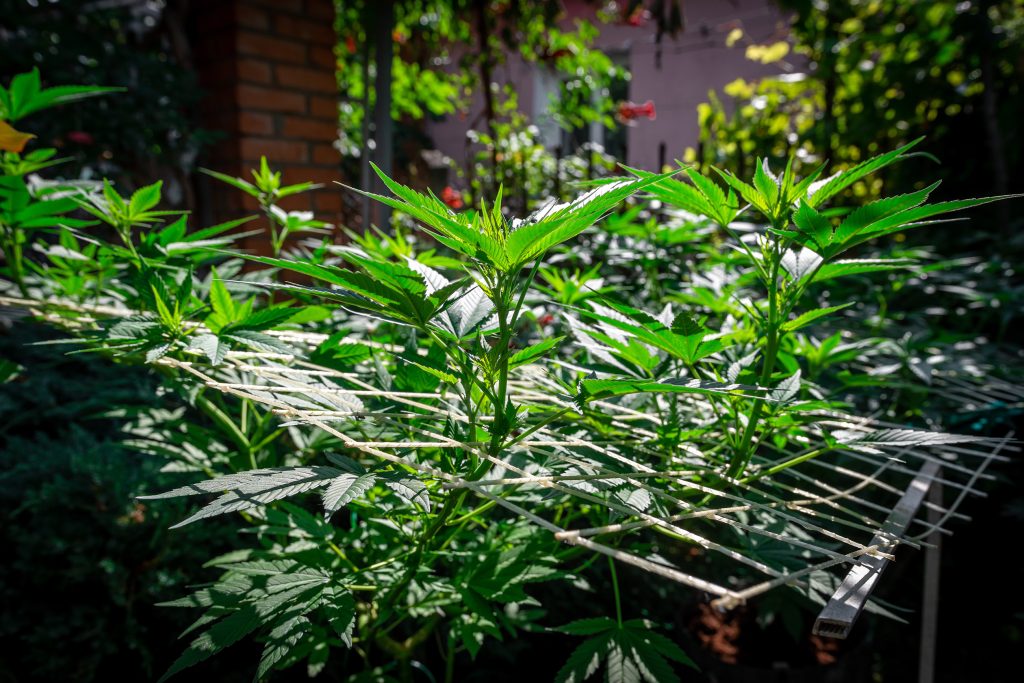
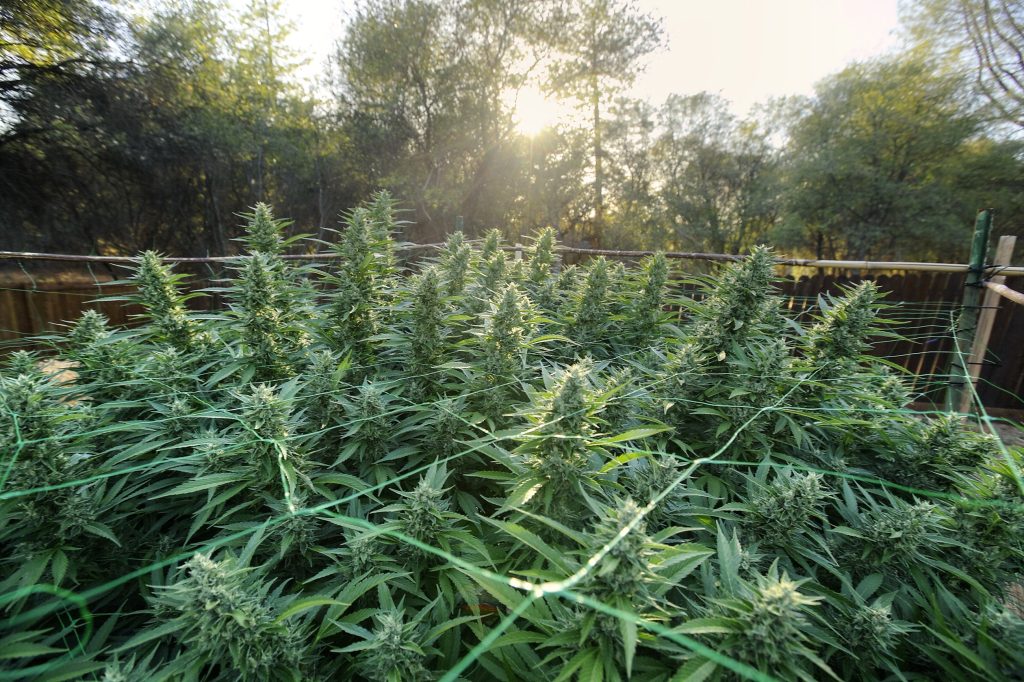
SCROG (or ScrOG or Scrog) stands for screen of green and is easily one of the best methods for maximizing the yield of a single plant. Scrogging a plant (yes, it can be a verb) is the practice of using a screen or net as a barrier to restrict the vertical growth of a plant.
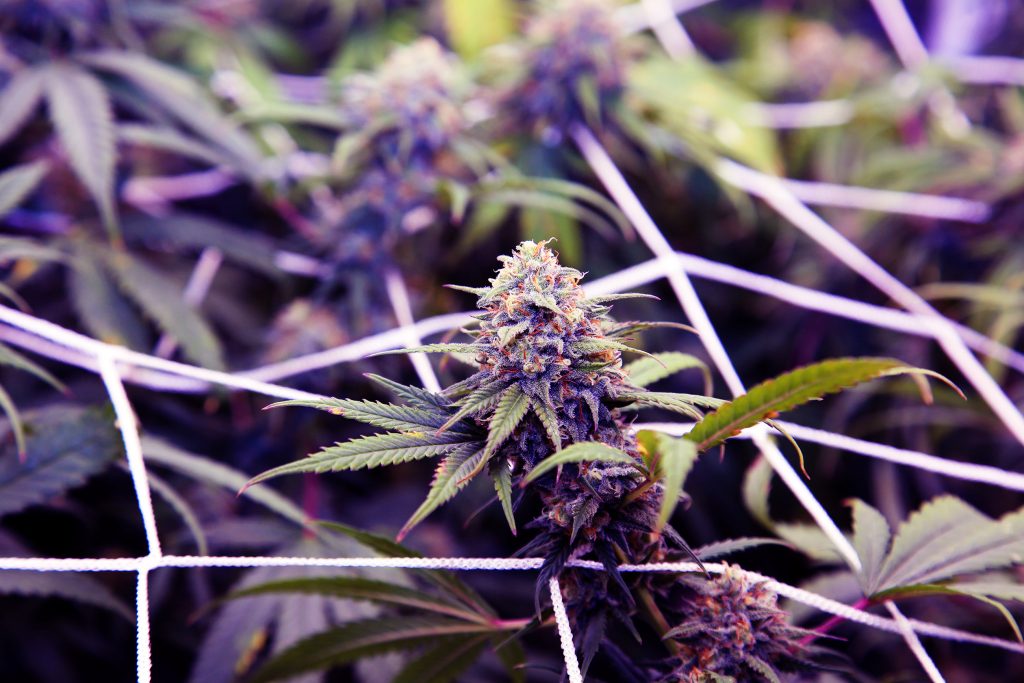
Basically, the stem and branches are woven or tied to the screen, forcing them to grow horizontally instead of vertically. During flowering, blooms originate from the same height across every branch allowing you to keep every bloom in the “sweet spot” for maximum light.
Scrogging can be tricky the first time. The extra work needed to properly scrog a plant can put growers off trying it. However, once you’ve set up a screen it only takes a few minutes a day to weave the branches through the netting. But once you get the hang of it, you just might find it worth the hassle as you’ll almost certainly produce more than any single plant you’ve grown before.
SCROG vs SOG

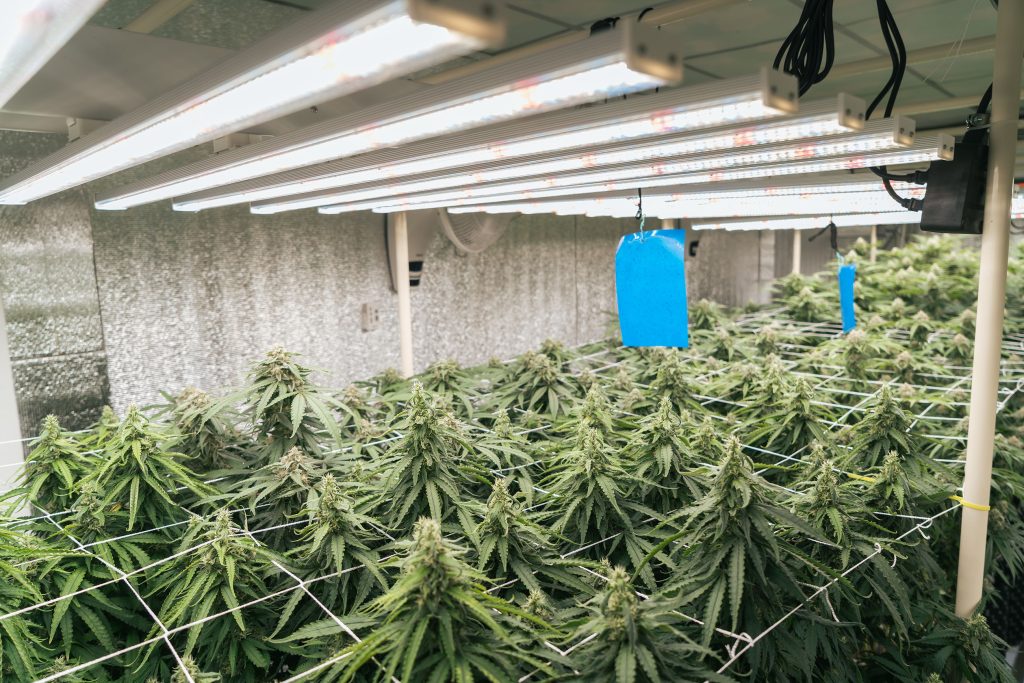
Screen of green and sea of green have a lot in common but they are also two very different methods. From the top, the two appear identical; dozens of flowers growing at a perfectly even level. But when you look underneath, you can see the difference. While SOG requires dozens of plants all flowering at once, SCROG uses as few plants as possible to generate the same effect.
Both have their own pros and cons that we’ll go over in the next section.
Why use SCROG?
Let’s be honest, at the end of the day the goal is to grow as much as possible with the space you have. Scrogging a plant is the most efficient use of space for a single plant that many growers can get. Scrogging your plant can provide several important benefits.
- Light
Plants love light. Seriously, the more the better. If left alone, cannabis plants will grow a single main cola that grows above the rest of the plant, minimizing the amount of plant that receives maximum light. By scrogging your plants, you can create a canopy that receives even levels of light.
- Yield
Since every one of your bud sites is getting enough light, your plant can maximise its photosynthetic potential increasing in size and resin production. The training involved turns a plant that would have only one main flowering site into one with dozens of heavy buds.
- Airflow
A properly scrogged canopy will get enough airflow both above and below. Adding a small fan will further increase the effect, reducing the risk of certain bugs.
Want to know more tips for combatting bugs on your plants? Check out our pest control guide.
- Efficiency
Many growers are limited by the number of plants they can grow. Whether it’s space restrictions or legal limits on the scale of home cultivation, doing more with less is always a worthy goal. If you’re limited to only growing 1 or 2 plants, scrogging is the best way to get the most bang for your buck.
Are there any disadvantages of SCROG?
No method is perfect; if it were we’d all be using it. Scrogging has lots of benefits, but it also has its drawbacks.
- Time
Training a plant takes time. At a minimum, you’re looking at 2-3 weeks and that could be twice as long if you’re mainlining (a technique we’ll go over later). In contrast, many SOG growers skip the vegetative stage entirely and go straight to flowering.
- Risk
Don’t put all your eggs in one basket, as they say. The risks involved with a single massive plant aren’t insignificant. If something happens, your entire harvest and months of work could go up in smoke far too soon.
- Work
Scrogging isn’t that much more effort, but it is a daily chore that some growers simply don’t have time for. It can’t be done halfway so if you’re going to scrog, you need to do it right.
How to set up a SCROG grow
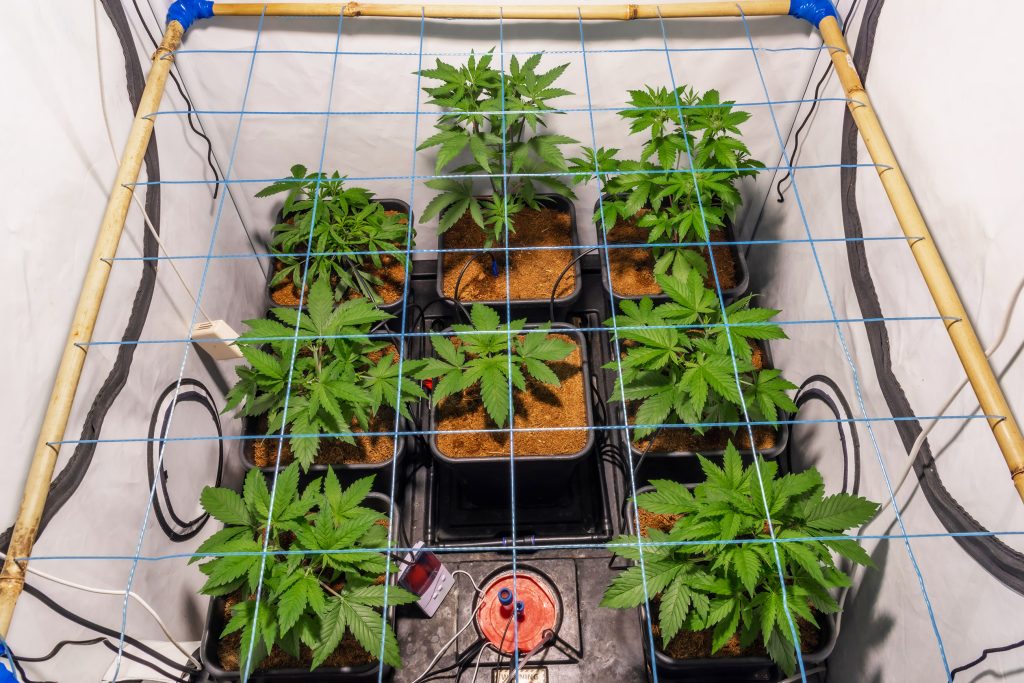
Scrogging starts before you’ve even planted your seeds. If you’ve been growing for a while but never tried a SCROG grow, you’ll likely need to make some adjustments to your grow space. There are two important things to keep in mind:
- Your plants are all equal distances from each other with enough room to grow out;
- You have a sturdy net that is level and fixed in place.
How much space do I need to SCROG?
Spacing is one of the most important aspects of growing multiple plants. The correct spacing helps to minimise mold growth and encourages maximal yield. Your goal is to fit as many plants as you can while keeping them far enough apart to get them the light and airflow they need.
A major advantage of SCROG growing is that plants can be grown in areas with limited height like cupboards or rooms with low ceilings. With modern LEDs, you can grow in spaces as short as 1.25m. The only thing to keep in mind is the distance from the light to the screen. This is a fixed distance that lets the canopy stay in the light’s sweet spot.
How many plants should I use in SCROG?
A good baseline is to shoot for four small/medium-sized plants per m² in pots no larger than 11 L. However, if you’re patient, you can fill any amount of space with just one well-trained plant.
What strains are best for SCROG?
In theory, any strain can be scrogged. However, you always want to pick the strain that is best for your space, time, and desires. Some strains, like pure indicas, have thick broad leaves that aren’t ideal for SCROG grows as they tend to prevent light from penetrating the dense SCROG canopy.
Additionally, some indicas are more brittle and their branches can be prone to snapping. Lastly, the low levels of stretch that indicas tend to possess means that it can take much longer to fill out your screen.
For these reasons, many scroggers lean towards sativas or sativa-dominant hybrids simply for their easier growing experience. If an indica is what you’ve got, though, then you can still use the SCROG method, it’ll just take a little longer.
Can I scrog an autoflower plant?
The general consensus is that scrogging is best suited for feminized seeds as these give you control over the plant’s vegetative growth period. This is important as you want to make sure that your plant is fully trained before you start flowering it.
Autoflowering strains have a predefined schedule and will start flowering whenever they choose. This results in fewer guarantees that the screen will be as filled as you might’ve hoped. If you’re set on scrogging an autoflower. Be sure to pick the biggest XXL genetics you can get.
What size pots should I use for SCROG?
Much like seeds, selecting the right pots will greatly aid your grow. What pots are best for your SCROG depends on just how many plants you’re trying to harvest.
- Single plant
If you’re scrogging a single, massive plant, a 25 L pot will provide enough room for your plant to build up a substantial root system and large canopy. Note that this is the minimum size. If you have the space, there’s no reason you couldn’t use up to 100 L pots.
- Multiple plants
If you’re looking to grow multiple plants together, you’ll need to consider your area and how you’ll space the plants out. An 11 L pot generally makes the best choice.
- Fabric pots
Scrogging greatly improves airflow through the canopy and using a fabric pot greatly improves the aeration of the growing medium.
What are the best lights for SCROG?
Many scroggers have heavily invested in modern LED grow lights. LED bar lights provide the most even lighting across an entire canopy. Additionally, they are significantly cooler meaning that plants can grow closer to them. The most common setups are LED panels as these produce the least heat while providing maximum coverage.
What is a SCROG net?
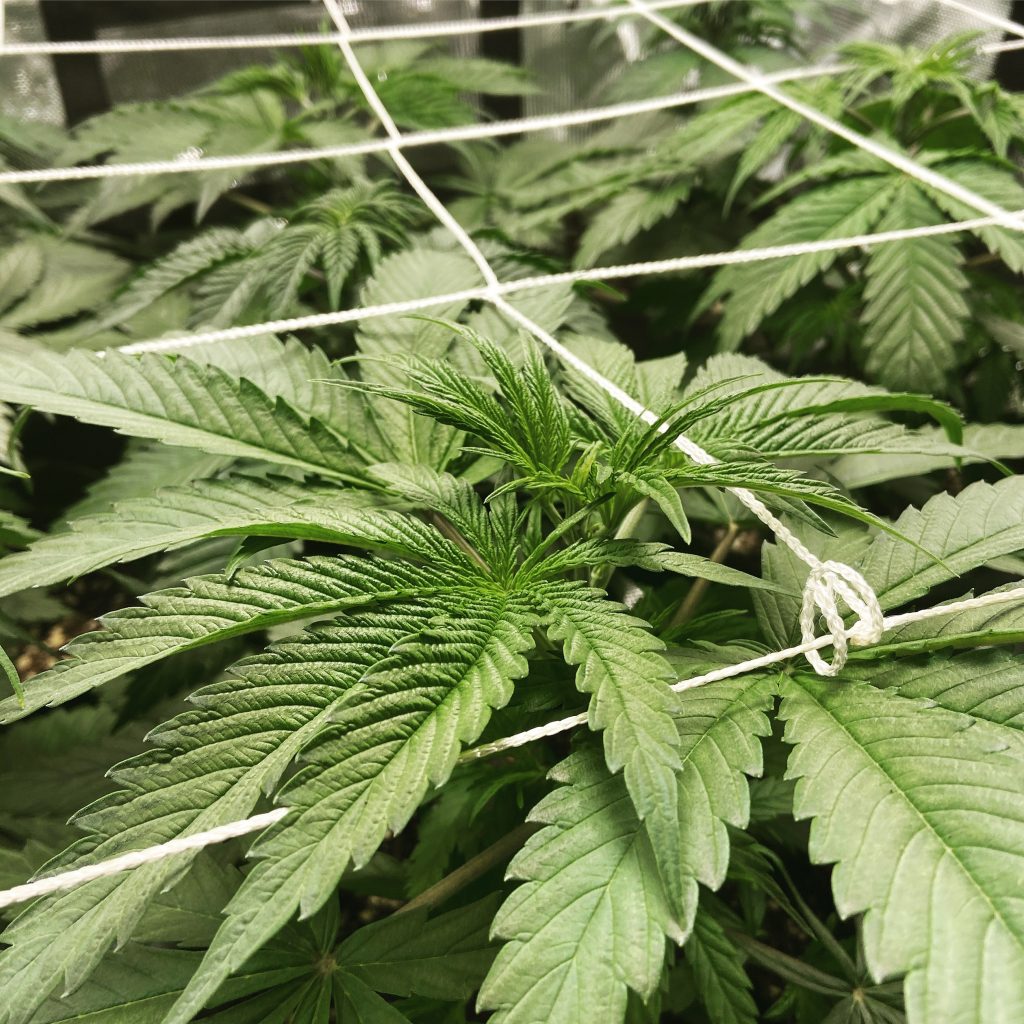
Scrogging, by its very definition, requires a screen or net to weave the branches through. Many grow tents are sold with a net but many growers will need to get their own. Luckily, it’s easy to make your own scrog net.
How to make a SCROG net
The specifications of what kind of screen you’ll need will depend on your space. Generally, though, you’ll need a frame and a net. The netting is the easy part, you’ve got a few options to choose from, and some are definitely better than others.
- String
Easily the best choice. String can be tied up quickly and when it’s time to harvest you can just cut it all up and throw it out.
- Twine/hemp
Also a fine choice for all the same reasons as string. The only downside is that you’re likely to get hairs in your buds as twine frays.
- Plastic fencing
It does work fairly well but it can be difficult to manage and shape. Also, it doesn’t look that great.
- Fishing line
Definitely not ideal. Fishing line has very little give and is likely to cut, choke, or kill a branch that is trying to grow near it.
- Chicken wire
The absolute worst. This is terrible as the buds tend to grow into the wire and you’ll need to cut the whole thing out. Do not use.
As for making the frame, the easiest solution is some spare lumber or some PVC pipes. Again, you’ll have to work with the space you’ve got.
How to use a SCROG net
Now that you’ve made up a net, it’s time to use it. The important thing to keep in mind is that the screen does not change its height, you need to make sure that it is in a fixed position so that all of your plant’s branches grow at the same level.
How high should a SCROG net be?
Typically, you’ll want to place the screen 20-30 cm above the top of your grow pots and about 30-45 cm below your light. The important thing is to make sure that your plants all have an even amount of light and ventilation.
When to SCROG
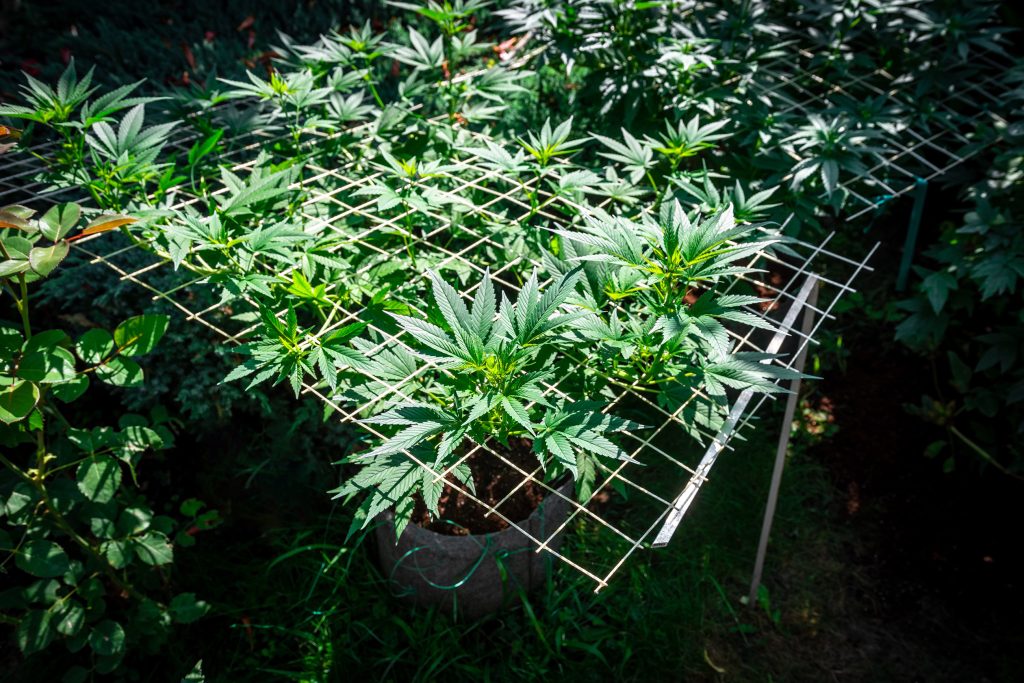
When scrogging it’s important that you stay one step ahead of the plant. What this means in practice is that you want to set the screen so branches grow into it. Ideally, you don’t want to push branches into it after. However, if you do need to place your screen after the fact, be sure to be extra gentle with your plants.
Keep an eye on your plants every day and help branches through the screen as they grow. The branches should be fully woven into the screen after topping and before flowering. If topping or pruning, your plant will change shape and undo much of your hard work. Also, you want everything set before flowering to not disturb the plants while they’re producing buds.
How to SCROG
OK, now that we know all about what scrogging is and how to get set up, it’s time to learn how to actually do it.
Step 1: Setting up your SCROG
We’ve already gone over the basics. Make sure you have enough space—both horizontally and vertically. Ensure that your scrog net is firmly in position and that your light is set up to provide a nice, even covering to the entire area.
Basically, other than the addition of your SCROG net, your setup should be identical to any other grow room.
Step 2: Vegetating plants with SCROG
How long you spend vegetating your scrog will depend on several factors but the process is the same regardless.
After a couple of weeks, your plant will enter the vegetative stage. This is when the main structure of the plant is determined and is the most important phase for SCROG growing. There are several techniques that need to be employed to make sure that your SCROG is done properly.
The most important technique in SCROG growing is topping your plant. Topping is the process of splitting a single cannabis stalk into two. The process is incredibly easy, reliable, and necessary for any SCROG. To top your plant, simply cut or pinch off the uppermost, smallest inner node of leaves. This will cause the plant to grow 2 stalks where there had only been 1. After a few days to a week, you can top these again, Now you have 4 main stalks.
Theoretically, there’s no limit to how many times you can top and split your plant. Scrogging is all about getting the most out of your plants and this is the key to doing that. Some growers can get more than 30 main flowering sites from a single plant.
Do I need to prune leaves in a SCROG?
While many growers are opposed to the concept of pruning, it is often necessary to allow light to reach lower branches that are still reaching the screen. Sativa leaves typically have thin fingers and are well suited to SCROG. Generally, it’s a good idea to remove any leaves that are blocking light from reaching flowering sites. No one like removing leaves, but doing so exposes more flowering sites to more light leading to heavier yields.
Step 3: Weaving your SCROG
Training your SCROG is absolutely vital to a successful grow. This is also where the net SCROG net that you made earlier comes into play. As mentioned, the net should be fixed in place 20-40 cm above the top of your pots. You should be topping your plant well before it reaches this height.
Once your plant starts to grow into your net you need to begin carefully — CAREFULLY! — weaving the branches under the net. Make sure to radiate them outwards evenly from the center. Remember, the whole point is to create an even covering of light and you want all of your flowers at the same height.
While the branches are stretching, let each one grow up and through a square in your SCROG net. It’s best to let them grow about 5-8 cm above the net before GENTLY pulling them back below the screen and moving them to the next square over. Keep doing this until about 2-3 weeks into flowering.
What if I break a branch during SCROG?
Don’t worry about it too much. Cannabis plants are hearty and resilient. If you snap a branch, taping a splint to hold it securely in place for a few days is usually more than enough to fix it. If the branch seems to be dying, though, it’s best to remove it as early as possible. This is unfortunate, but with so many flowering sites, you should be fine.
There are several techniques that can be used to make the weaving process easier and more productive. Check out the “Best SCROG growing techniques” further down for some advanced tips and tricks.
Step 4: Flowering your SCROG
Cannabis starts flowering once you reduce the light from 24 hours to 12 hours on and 12 hours off. This is known as “flipping” your grow. When should you flip your scrog? Well, scrogging requires patience. Don’t start flowering until all of your branches are at least partially woven into the net.
But don’t wait too long, either. Many strains grow as much as 2/3rds of their total size during flowering, so make sure that you slip your scrog soon enough to leave room for your plant to grow.
For many typical hybrid strains, many scroggers wait until the screen is around 75% full before flipping. If you’re using an especially stretchy sativa you may want to start flowering a little sooner, maybe around 50%. Conversely, if you’re using more indica-dominant hybrids, then you may prefer to wait until the net is almost full before bloom.
You’ll keep weaving the branches throughout the next few weeks. Just because you flipped your grow doesn’t mean that your work is done.
Eventually, you’ll come to a point where you can’t tuck any more branches as they’ve simply stopped growing. When growing a typical hybrid it’s generally best to stop scrogging one week (maximum 2 weeks) before stretch finishes. This will allow you to completely fill your screen and still allow for some vertical growth.
Best SCROG growing techniques
There are several techniques that go hand-in-hand with scrogging to help growers get the most out of their plants. Here are a few of the best tips and tricks to get you off the ground.
Low-stress training
Low-stress training (LST) involves gently bending and/or tying branches down to force them to grow into the shape of your choosing. Since this doesn’t actually damage the plant, it doesn’t need much time to recover.
LST is vital during SCROG growing as it will allow you to better shape your plant the way you want it. Essentially, all scrogging requires at least some degree of LST. For a SCROG grow, it’s ideal to start using LST as soon as you’ve topped your plant. As soon as your stalk starts to split, you want to tie down the four new branches to form an “X” shape.
Keep doing this after each topping and for every branch before they reach the screen. This will make sure that your plants are flexible enough and in the proper shape for a true SCROG grow.
Lollipopping
Lollipopping is the term for removing the lower leaves and flowering sites from branches. While this may seem counter-intuitive, it actually increases airflow and allows the plant to focus its energy on the flowers receiving the most light.
Lollipopping is ideal for SCROG growers since it prioritises the flowers growing on the screen while removing the unwanted smaller buds lower down. Typically, anything below the SCROG net should be removed. This is best done near the end of the vegetative phase and again a few weeks into flowering once you’ve identified the sites you want to focus on.
Mainlining
Mainlining is essentially the most advanced form of topping and is vital to a successful SCROG grow. If you can top a plant once, you can mainline it. Here’s a quick-and-dirty guide to get you up and running.
- Top your plant at the 3rd node to create two new main stems.
- Remove any and all growth below this split. This will encourage the plant to divert all of its energy into the new stems.
- Gently tie the 2 new stems down at right angles to the soil. This is essentially LST at this phase.
- Give your plant a few days to recover and form some new growth. Then top each of the main branches again to create a total of 4 new sites.
- Tie these 4 new stems down and once again remove all other new growth. By now, you should have a perfectly symmetrical canopy forming on both sides of your plant.
- Repeat until you have the desired number of stalks. Note that in a SCROG grow, each of these stalks will produce only one main cola.
Supercropping
Some strains have thicker or harder stems and bending them to weave them into your SCROG net can be difficult or even dangerous. You can make your branches easier to work with using super cropping.
Super cropping is a high-stress method that involves very carefully squeezing and pinching branches to the point where they nearly snap. Doing this both increases light penetration through the canopy and can also help you work woodier strains into a SCROG setup.
Super cropping works by damaging the plant’s inner tissue without actually breaking the plant. This is, of course, a fairly risky technique as doing it wrong could result in the branch being completely killed. Super cropping is best done early in the vegetative stage before your plants reach the screen.
To super crop your plant, follow these steps:
- Select the branch. You want to pick one from an older part of the plant where the tissue feels soft and bendy.
- Grab the branch between your thumb and index finger and squeeze it gently while rolling it between your fingers for about 10 seconds. You’ll feel the inner tissue soften.
- Bend the branch in the direction you want it to grow and bandage it with a splint and tape if needed. This may cause the branch to droop, but it should recover in a day.
And there you have it. Hopefully, this should give you the confidence and knowledge to start your own SCROG grow and start getting the most out of your plants. Got any other tips for the community? Be sure to let us know in the comments.


